Neo4j: a really cool graph database

Okay, exciting times ahead...
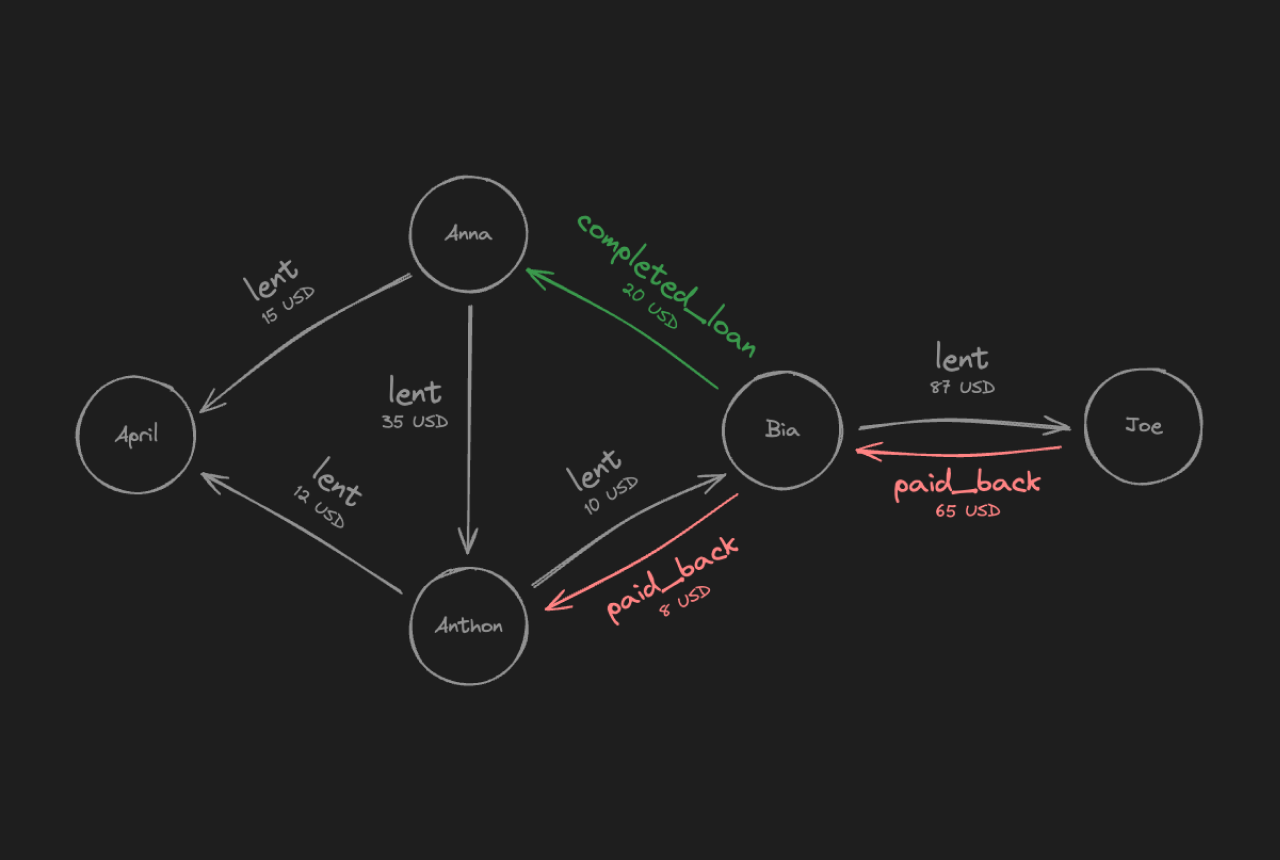
In this article we're going to use a graph database called Neo4j to discuss how a Money Lending Tracker database would look like if we were to use graphs in our persistence layer.
Let's imagine we're building an app.
The core idea is simple:
Friends will use this app to keep track of who lent money to whom.
With that in mind, here's what we're going to cover in this article:
- Graph formal definition—it's easier than you think, please don't leave 😁.
- Basics of Neo4j.
- Graph DB vs SQL to solve this kind of problem.
I'll try to keep it short and to the point.
Enjoy the ride.
Graph definition
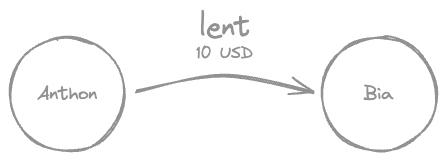
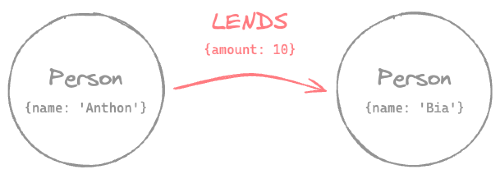
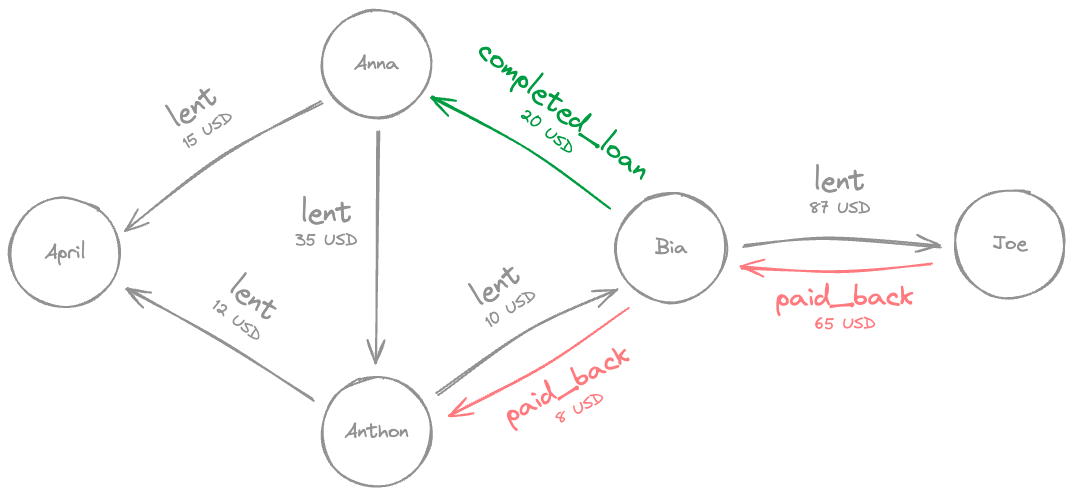
A graph, simply put, is a collection of items and the connections between those items. If we take the image above as an example, Anthony and Bia are the items (or nodes), and the act of lending $10 is the connection (or edge) between them.
Probably you've already come across the following definition of a graph at least once in your life—no worries if you haven't:
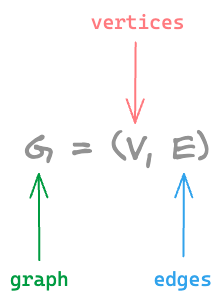
This translates to: A graph G can be defined as a pair (V,E), where V is a set of vertices, and E is a set of edges between the vertices.
In our Money Lending Tracker example, the vertices are the people (like Anthony and Bia), and the edges represent the lending relationships between them. See image below:
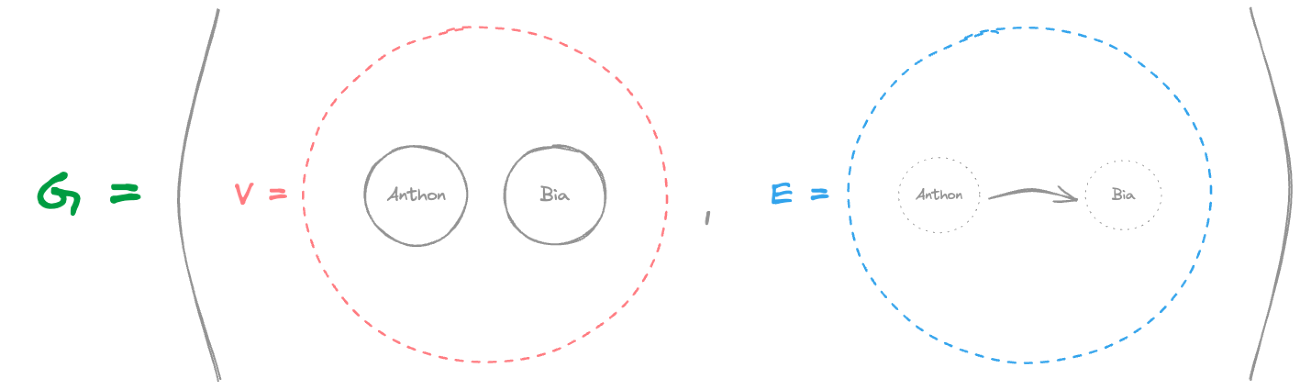
This formal definition helps us understand the fundamental structure that graph databases, like Neo4j, use to model relationships efficiently.
Neo4j: An introduction
From their own definition:
A Neo4j graph database stores nodes and relationships instead of tables or documents. Data is stored just like you might sketch ideas on a whiteboard. Your data is stored without restricting it to a pre-defined model, allowing a very flexible way of thinking about and using it.
Installation
The easiest way of get up and running with Neo4j in my opinion is using Docker.
There's an official Neo4j image on Docker Hub which you can spin up like this:
docker run -it -d \
    --publish=7474:7474 \
    --publish=7687:7687 \
    --volume=$HOME/neo4j/data:/data \
    --env=NEO4J_AUTH=none \
    neo4j
After that, open your browser and go to http://localhost:7474.
You should be seeing something like this:
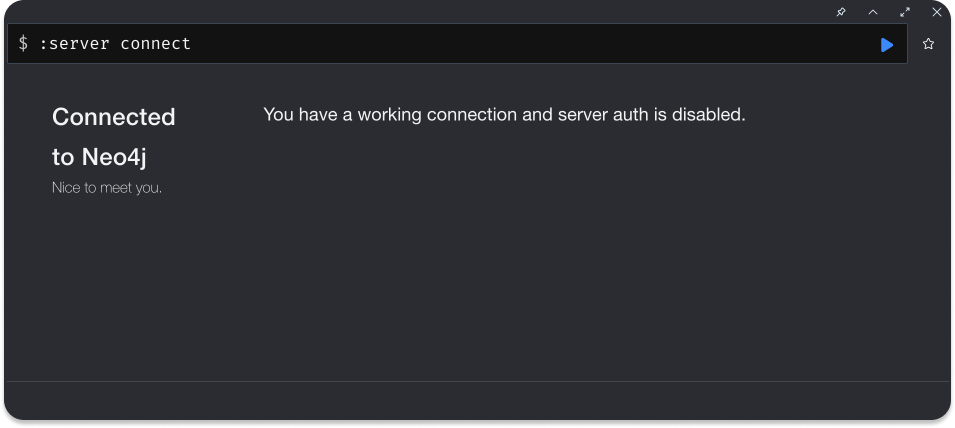
Let's now start with the fun part, shall we?
Cypher: The query language
To make interacting with graph data intuitive, Neo4j uses Cypher as its query language.
Similar to SQL in relational databases, Cypher allows us to create, read, update, and delete data, but it's specifically designed for working with nodes and relationships in a graph structure.
Without further ado, let's see how to create a node in Neo4j using Cypher.
Adding nodes
The syntax is very intuitive:
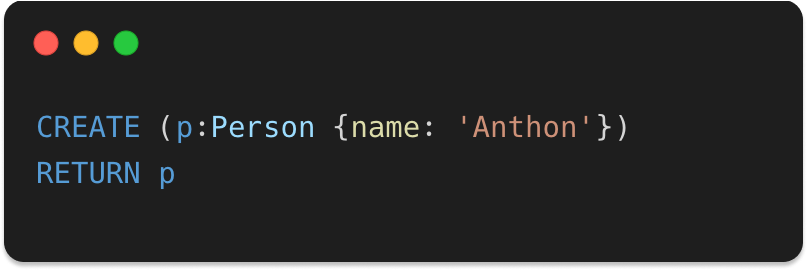
Yes, I know. It's an image. You might be thinking 🤬
Still, I'd rather you type it than just copy and paste. 😇
Moving on... ⬇️
Let's now understand the first line of this clause:
- The
CREATEstatement
As you might have guessed, it's used to add new data to the graph. In this case, it creates a new node representing a person. Think of it as inserting a new record into a database. - Node labels:
Person
Labels help group similar nodes (like people, products, or locations) and make it easier to search and query specific types of data. - Node properties:
{name: 'Anthon'}
This part defines the properties of the node, in this case, assigning the name "Anthon" to the node. Properties store additional information about a node, like attributes in a relational database, such as a name, age, or email.
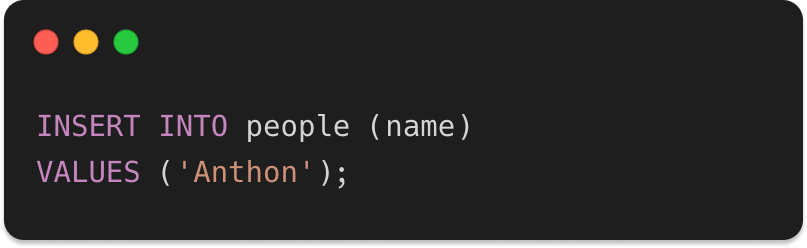
Quick excursion to SQL land
For the SQL folks out there, this is comparable to inserting a record in a table called people, but without having to create a table before, like in most NoSQL databases.
Now back to Neo4j...
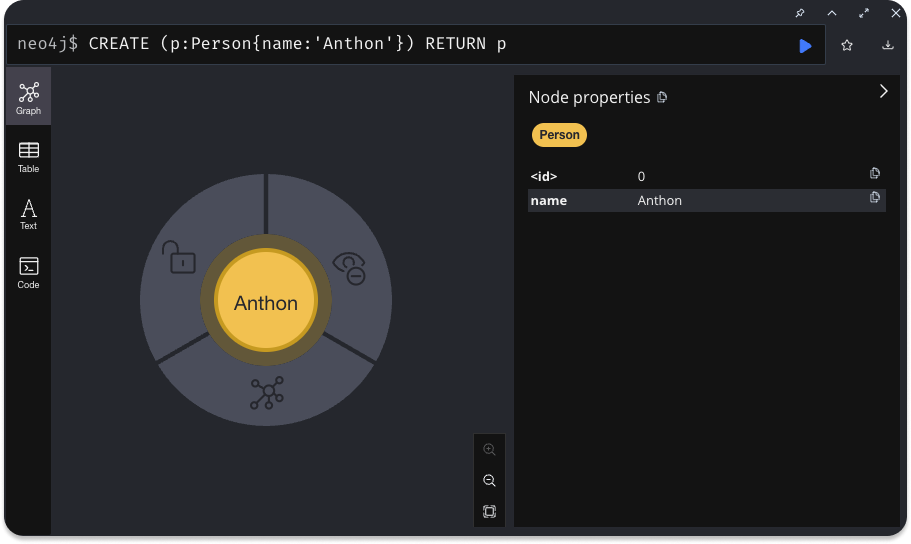
If you have been coding along, you are probably looking at something like this right now:

Which is the visual representation of the node you've just created. Cool, huh?
You're seeing it because:
- in the first line we added a reference
pto the node we wanted to create - in the second line we returned it with the
RETURN pstatement
If you click the node Anthon you will see its properties on the right hand side.
Cool... Now let's add the second node to our graph.

Pretty easy, right?
Yes, it's an image again btw. 🤓
And now you are looking at Bia's node and might be wondering...
How can I...
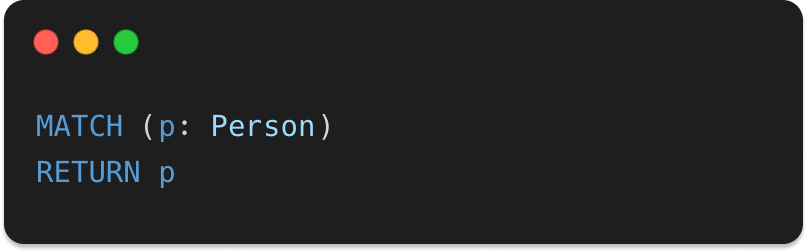
List all nodes
You can list or match all nodes of type Person—or of type Person if you will—like this:
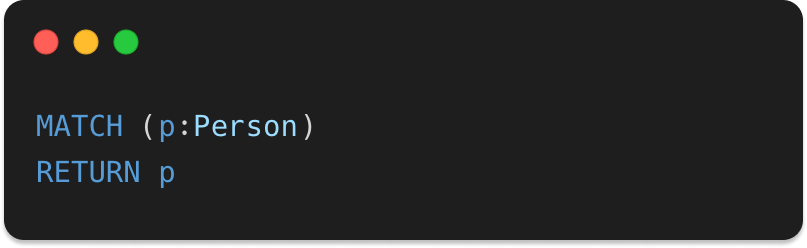
Let's now have a closer look at what's going on here:
MATCHis used to query data from the graph.- With
p:Personwe are telling two things:- I'm looking for nodes of type
Person. - And I'm going to refer to each matched node as
p.
- I'm looking for nodes of type
Again, if you've been coding along, you must have ended up with something like the following:
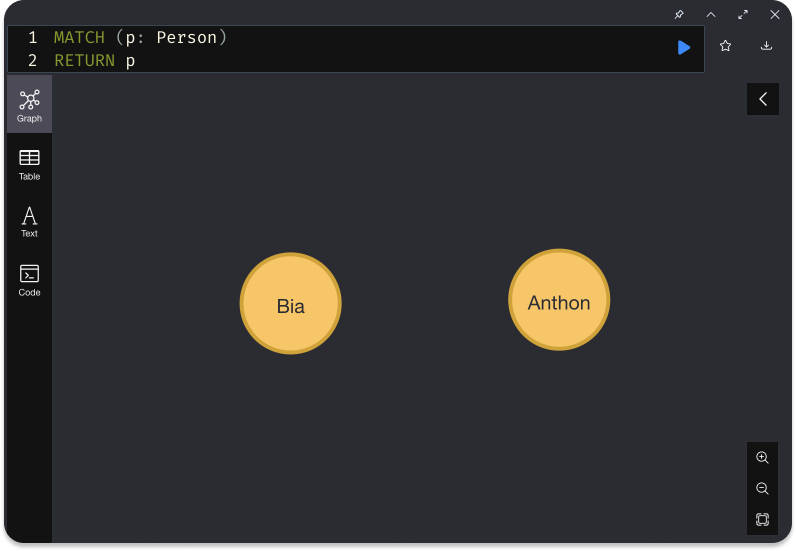
Up until now we've only handled nodes in our database. And maybe that's why nothing really looks awkward so far.
Just one more thing before we move on...
List nodes with a given property
Let's say we don't want all nodes of a given type, rather we want also to filter by the node's properties, like:
Person which have property name: 'Anthon'There's only one tweak we need in order to retrieve nodes with a given property, which is adding the property like this:
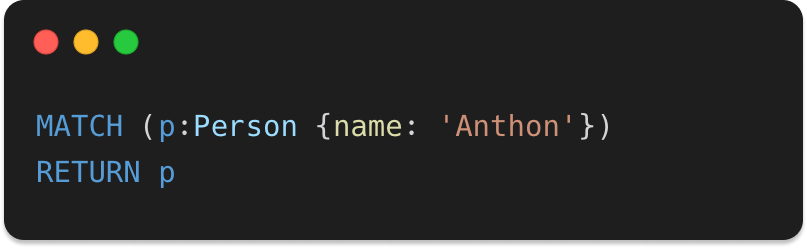
Running this query would return just one node.
Person having a property {name: 'Anthon'} this MATCH clause would have returned all of them.Easy and intuitive, right?
Now let's see more interesting stuff...
Connecting the nodes
If you remember well, graphs are composed of nodes and the connections between these nodes.
Connecting nodes is what's missing us at the moment.
First we need to retrieve both nodes we created in the steps before, so we can connect them.
We've already covered the retrieving part using MATCH remember?
So, let's MATCH those babies already, shall we?
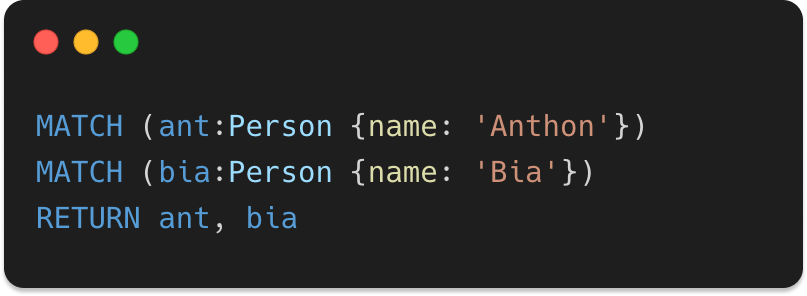
And that should output the same result as matching all nodes, because all we have in our database so far is those two nodes.
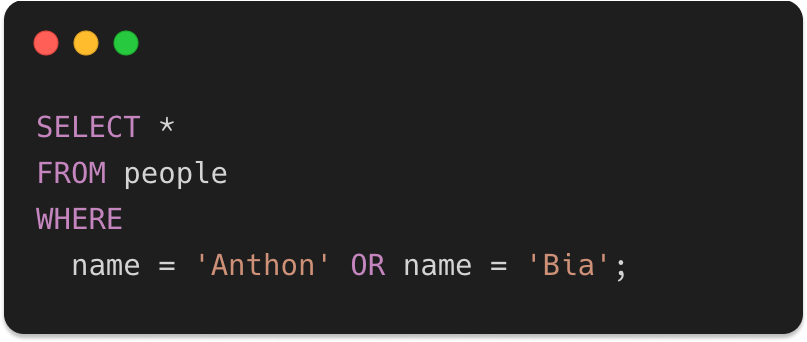
Let's make another quick excursion to SQL land to make things crystal clear.
The SQL equivalent to the above query would be:
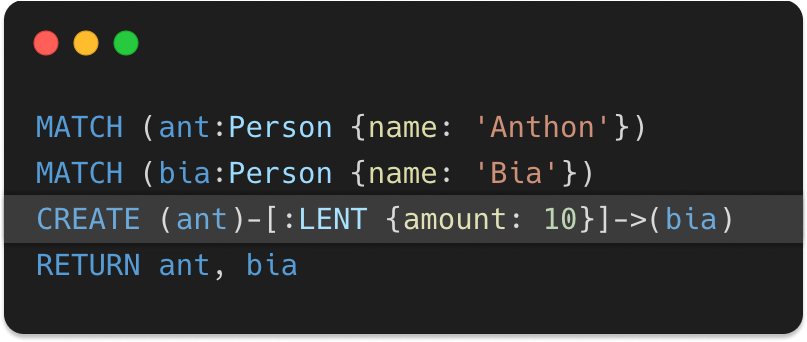
Now it's time for us to add the long waited relationship between these two nodes, and here's how it's done:
No panic... All good! Don't close this tab just yet.
This syntax is probably not familiar to many people, so that's why I'm going to also break it down and explain piece by piece.
First let's talk about the nodes. In Cypher, nodes are always represented in parenthesis, like this:
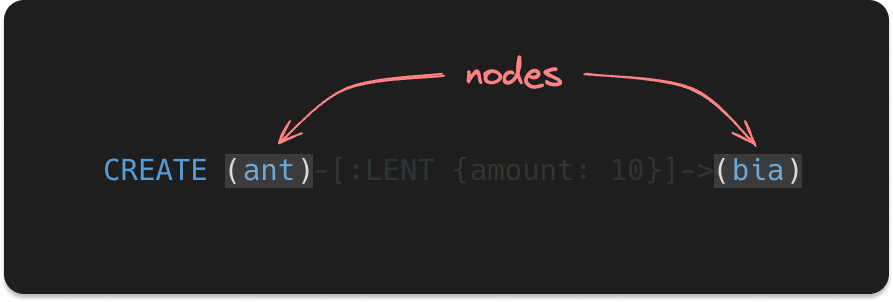
They kind of resemble part of a circle missing the top and the bottom part, don't you think?
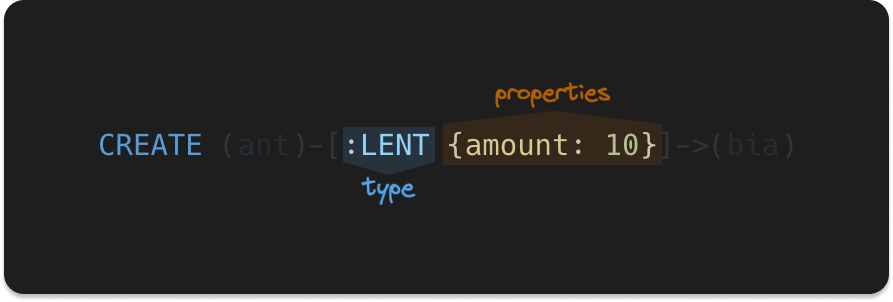
The CREATE clause allows us to also create relationships, and those are also labeled—or typed if you will—and may also have properties, just like the nodes.
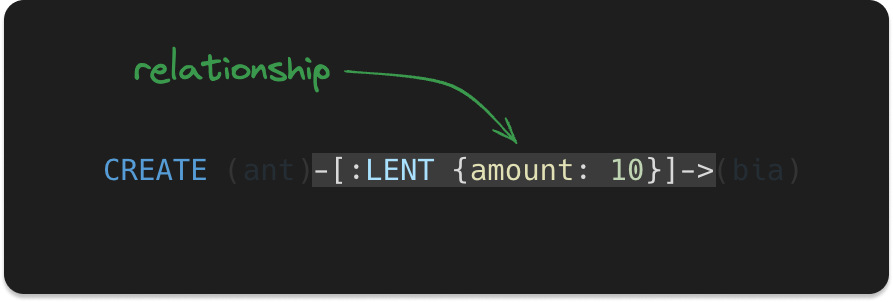
Relationships in Cypher resemble an arrow with a rectangle in the middle, where some metadata can be added: type and properties.

The metadata are defined in square brackets in the middle of the arrow.
Also, if you need a reference to the relationship as we did for the nodes, it can be placed before the colon, exactly as the node references.
Before we move on...
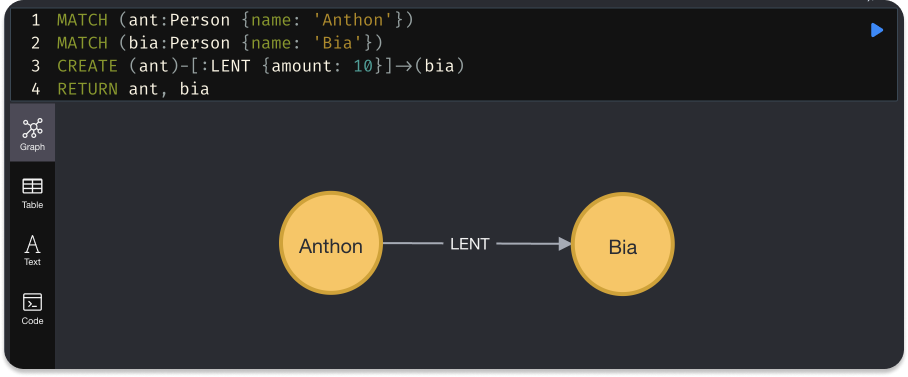
And finally, by running this clause, it should return both nodes and the relationship between them, like this:
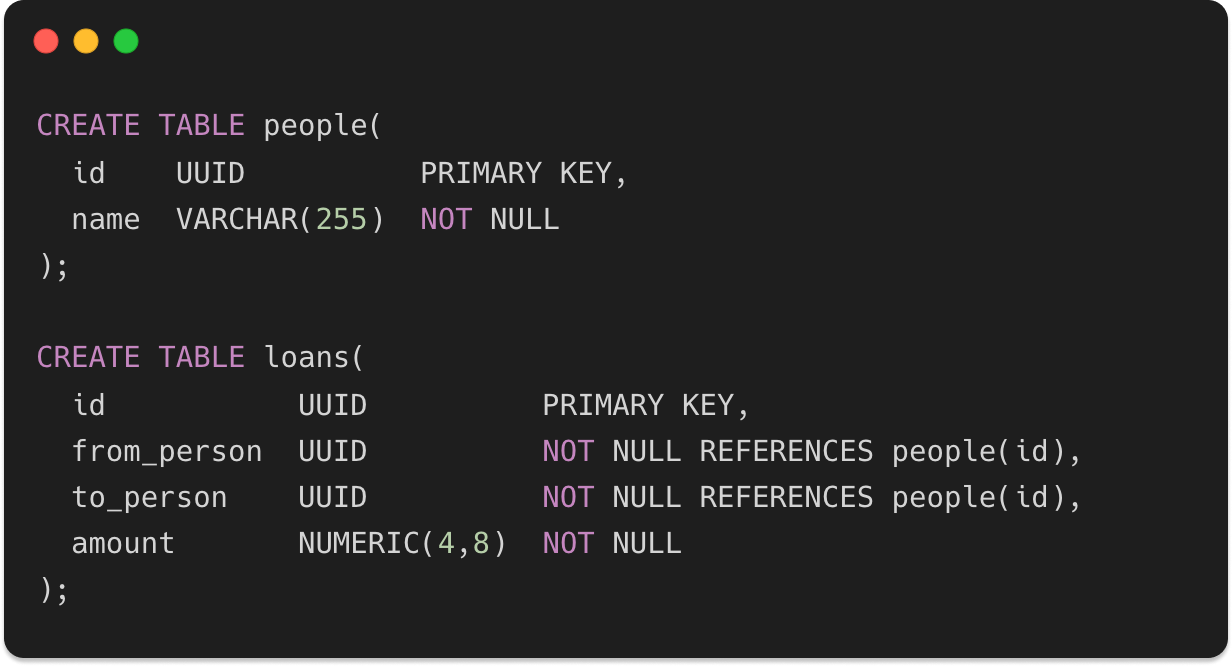
If we were to compare with SQL, we would need two tables to achieve the same result: one to store people and another for the loans. Something along these lines:
For simple relationships, like the one from our example, there's not really a good reason why you should use a graph database instead of SQL.
However, if we're start looking at a more complex relationship scenario, now graph databases start to shine.
This whole graph, with all nodes and relationships, could be very easily retrieved by running the following query:
Pretty easy, huh?
Now you might be wondering...
What's next?
If you read everything up to this point—first of all, thank you—and graph databases sparked your interest to dig deeper, here are a couple of suggestions on what you might consider doing next:
- Try to replicate the last graph in Neo4j by adding the remaining nodes and relationships.
- If you want to understand how graphs work under the hood, check out my other articles: this and this.
- Read about the
MERGEclause here and understand the difference betweenCREATEandMERGE. - Learn how to update data with the
SETclause here. - Learn how to delete data with the
DELETEclause here and theREMOVEclause here. - If you want a little bit more of challenge, you could consider using Neo4j or other graph database on your next project. If you do so, I'd love to see whatever you build. So, make sure to drop a comment with a link to your Github project 🚀
Thank you for reading!!!
That was all I had to share in this article with you.
Now, I'd love to learn a little about you and your experiences.
- Was this article was relevant to you?
- Did it inspire you somehow?
- Did you know graph databases existed?
- Have you ever worked with one graph database before?
- What was your experience like?
Let me know in the comments section below.